Angeline Era
[002] - The Autocuber: A Tool for Making 3D Levels!
Follow updates on my Substack: https://melodicambient.substack.com/
In Devlog 1,I mentioned the Autocuber. When it comes to making games in small teams, it's also important to have good tools. Making good tools can often feel very close to engine programming, but in a lot of ways the decisions you make in tool design feel like game design - they're collaborative between Marina and I, and oriented towards the kind of visual or level design problems we need to solve! Tools programming felt intimidating to me, but over multiple games I've built up experience in event/cutscene, sound, level design tools, etc, and each time they've expanded what we've been able to do. With this next game, we decided to take a stab at making a true level design tool, and it's turned out well!
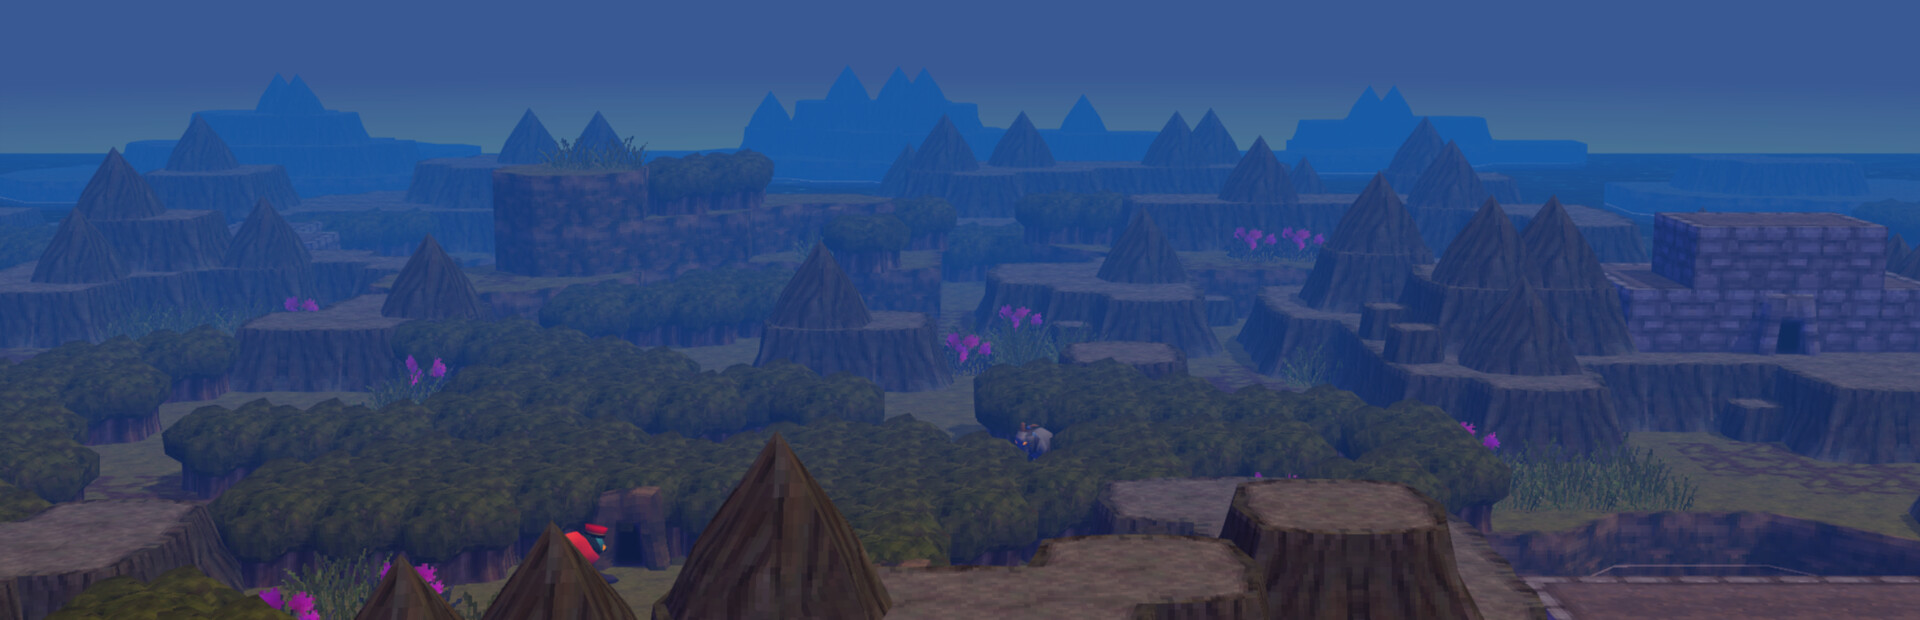
I'd like to post the source code at some point, but for now I'll just give you a brief overview, and try to avoid technical details. First, check out this video for a sense of what the Autocuber does.
You'll see that I can paint on different planes (both vertically and horizontally), as well as select different cubes from a palette. Further, you can see the cubes 'autocubing'. Lastly, there's even an option to things that aren't cube shaped - like the bushes.
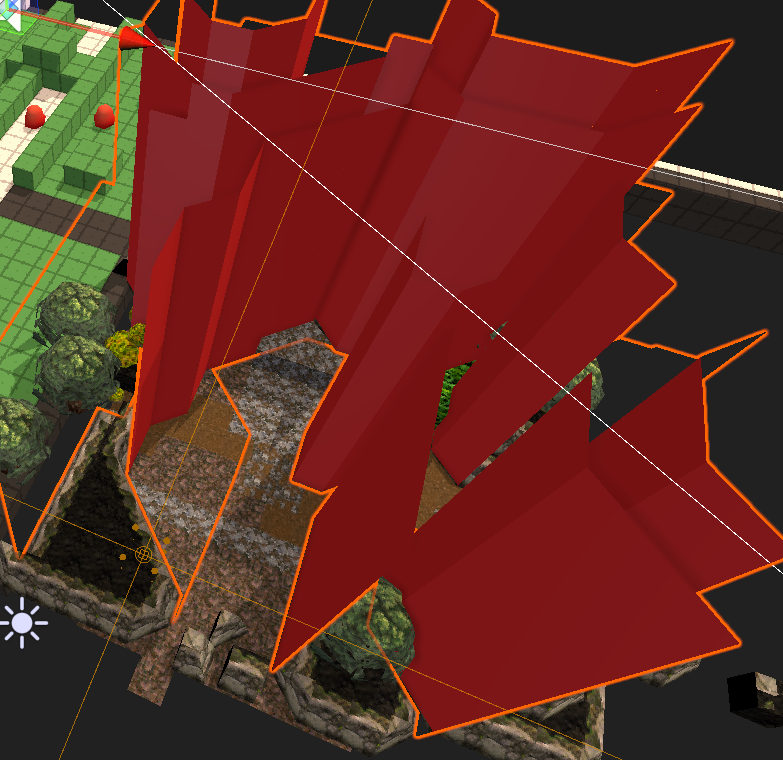
So how does it work? Maybe it's easiest to start with the UI. First, keep in mind that with the autocuber, I'm always painting on a 2D plane (although there is a tool that lets us easily draw or delete rectangular prisms).

1 is the "cursor cube", a grey cube which denotes where in space you'll place the next cube. This is needed as the green wire mesh alone doesn't let you perceive depth well enough.
2, the weird orange cube/sphere thingy, is the "3D Cursor". By moving this cursor around, you can paint on different planes. This is needed, otherwise it's hard to get around the scene. It works via a raycast into the scene (all placed cubes have mesh colliders - more on how that gets optimized soon)
3 is the 'room chunk'. It serves an optimization function - anything within a 14x14x1 chunk has its meshes connected, and represented in a single game object. It also serves a design function: in our game, all rooms are 14x14 in size (or bigger, in integer multiples.) This is also used to help with optimizing enemies, etc, and helps drive a general sense of what you can see at any given time.
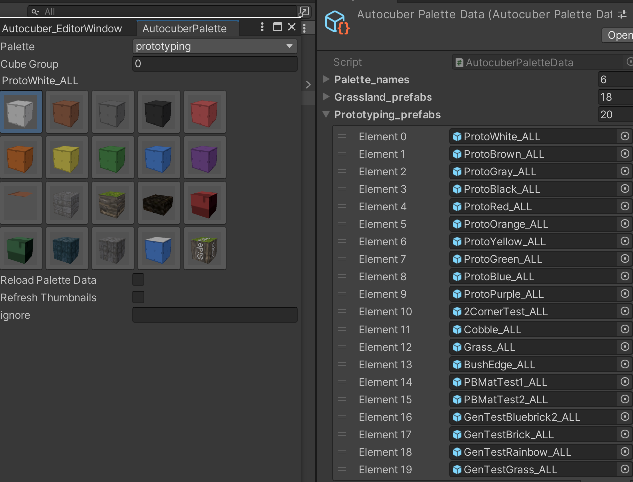
The Palette
When I want to select a different cube to draw, I can just click on it in the Palette window. You can select from different palettes (organized by area - e.g. City, Oak Forest). Cubes from different palettes can be mixed into the same level, but they're organized into palettes for ease of use. You can see the ScriptableObject being used to store palette data on the right.
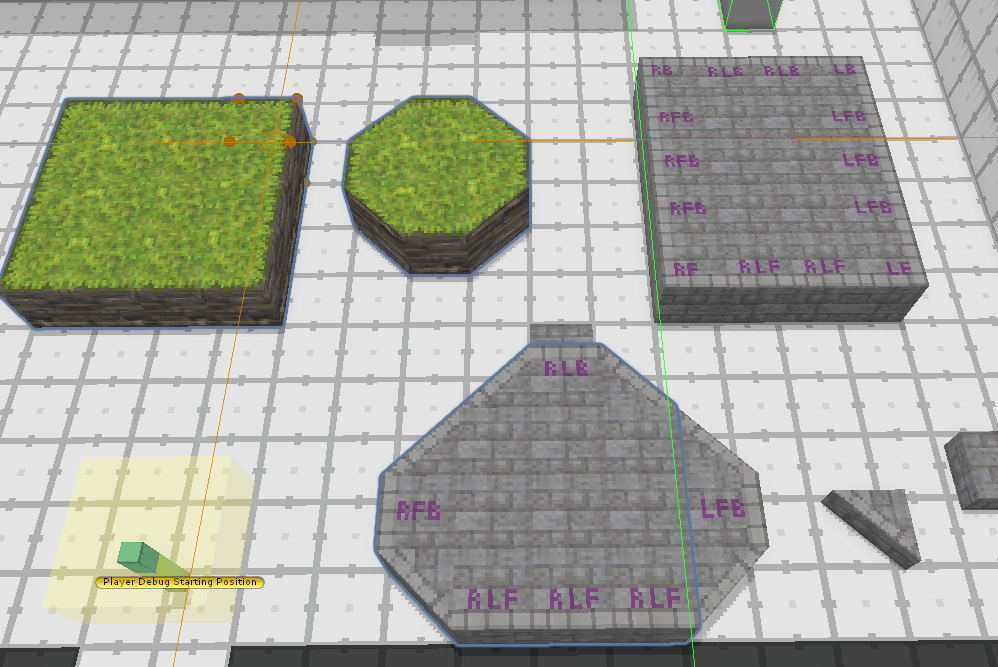
Cube Suffixes and Rotations
You might be wondering what the "_ALL" means in the cube names - ProtoWhite_ALL, Grass_ALL, etc. This simply means that this cube, visually, has no edges - and thus touches something on "ALL" sides. There are other suffixes, like RF (which means the cube has no edges on the RIGHT (+x) and FORWARD (+z) sides). Likewise there's LB (Left, Back), RLF, etc. Here's a picture of that.
There's a bit of complexity to the cubes when it comes to those edge and half (the triangles) cubes, but a large chunk of it can be automated. For instance, much of the time, if we want a half-cube (the triangles), we don't need 4 different prefabs to represent each rotation state. We just need one, and the engine can rotate for us. There is an additional layer of complexity - some cube textures don't look right when rotated - but my tools can also generate different 'variant sets' that will adjust the UVs as needed.
For instance, take a look at this texture below.
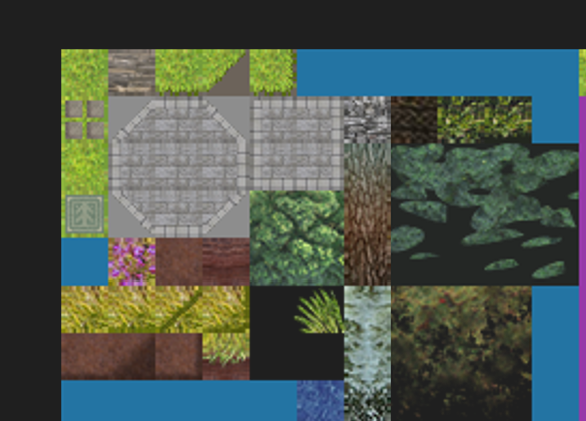
You'll see the green grass has far fewer tiles than the grey cobblestone. That's because the Autocuber can just rotate or reflect the UVs of the grass when it needs to rotate. On the other hand, the cobblestone is a more complex texture - so all of the rotations need to visually be in the texture. The Autocuber can assign/adjust UVs for all of the rotational variants as necessary.
The cube prefabs are generated through a tool, so that the artist doesn't have to make 10,000 prefabs in blender. I simply take a base cube or half-cube prefab, then change its material and adjust its UVs as needed, creating a new cube asset!
Drawing Levels
So, when you place a cube, the Autocuber checks its neighbors and sees if the cube you placed needs to be updated to be a certain edge or corner. That's how we get the nice effect of the edges automatically filling in.
There's a few other tricks, like "Cube Groups". This is a number that we can set on each of the cubes in a palette. If a cube is in the same group as a neighboring cube, then that cube will 'know about' the neighboring cube, and adjust itself to connect properly. If it's in a different group, then the placed cube acts as if there's nothing there. Well, it's a bit hard to explain in words, but... imagine we want some cobblestone in the middle of grass. If the cobblestone recognized the grass, then we'd never get to see the cobblestone's edges!
Other Tools
As I mentioned there are various tools to draw 3D shapes, like rectangular prisms. The tool also optionally avoids placing the inner cubes, so as to stay optimized. (E.g. a 10x10x10 prism would only need about 500 cubes, not 1000). This rectangle tool can also be used for placing invisible walls!
There are also replace tools, where you can replace all the cubes of a certain type in the room, or the whole level. There's different modes of placement, like a "Place-On" mode. In this mode, cubes will be placed above the cube your cursor is on. This makes it easy to place bushes, rocks, etc.
You can also click to rotate a cube in place, and there is an eyedropper tool. There's also a tool that lets you move rooms around (in room-sized chunks). This is useful for prototyping levels and having some flexibility with the arrangement.
We also have tools for drawing in a line, and of course, deletion tools, which work either with the regular cube brush, or with the 'draw a rectangular prism' mode.
The UX of the deletion is interesting: if you tap, then you enter delete mode. But if you just hold, then delete mode will end once you've released the delete hotkey.
Invisible Walls
Oh, and we place invisible walls with a trick. If a cube prefab contains "BLOCKER" in its name, then it will generate an invisible wall mesh. This saves a lot of time with delineating what parts of the map are out of bounds.
Likewise, there are other special keywords - like "PROP", which will tell the autocuber to avoid some optimizations and to store the object differently.
Optimization
Okay, that's an overview of the tool! So how does it stay relatively performant through development?
As you might know, in Unity you can only have a couple ten-thousand game objects before things start to get laggy, unless you use special coding techniques. That's where 'chunking' comes in!
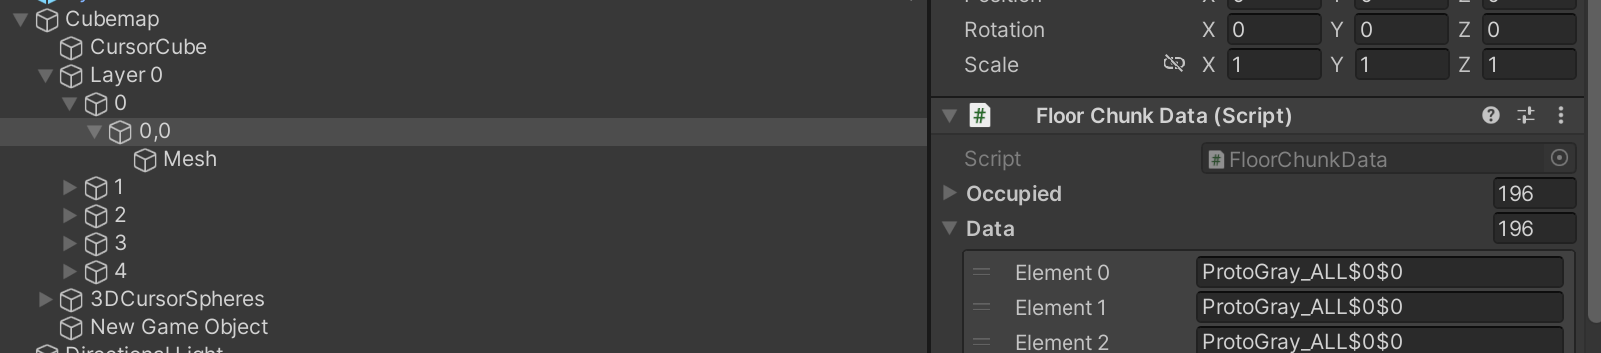
Probably the hardest (and most necessary) optimization was - what the autocuber does is, since every room is 14x14 - every 'floor' of 196 cubes is combined into a single game object and mesh. Each of these game objects has a script which stores the data of what cubes are in each cell. Whenever a cube is placed or deleted, the whole mesh for the chunk is recalculated. I thought this would be hard, but actually it's pretty easy. I can show the code some time.
If we didn't have this, there would be 200x more game objects in the scene...and it would be impossible to make levels lol. I think there are further optimizations one could make, but this works well enough.
The base format of a data string is NAME $ ROTATION $ UV . Rotation is a number corresponding to a certain rotation value (sometimes also containing a reflection of the texture's UVs). UV refers to an offset - our texture maps are split into quadrants, and optionally, cubes can be randomly offset into other quadrants to create texture variants. (For instance, we can have it so that a grass tile spawns a flowery grass tile at a 10% chance. There's a script that Marina can edit to enable this behavior.)
There's also a small optimization, which is that Chunks aren't rebuilt until the end of a frame. (This is because sometimes chunk data gets updated multiple times in one frame - if I rebuilt the chunk every time data is updated, the Autocuber would be sort of slow-feeling at times.)
The last big optimization is face-deletion. When a chunk is rebuilt, the engine checks if there are adjacent cubes. If so, then the touching faces can be deleted so as to save space in the scene file. (Scene files can get sort of big - 10 MB+ for a couple thousand cubes - since the mesh data of the levels is being stored in the scene).
However, the player doesn't see any of the performance issues of this as the last step in making levels is merging and optimizing stuff in Blender. (Although, to be honest, the levels aren't all that big, so most computers can handle playing an unoptimized map!)
Data Storage
If you look up at that picture, you'll notice the "Layer0 > 0 > 0,0" hierarchy. That's how the data is stored. It means "In room 0,0 at y-coordinate 0". I like this method, because it's easy to debug, and it's also easy to run tools over the data structure and adjust things or rebuild. It does get a bit unwieldy in a very vertical level (as a new chunk is generated for each floor, even if it just has one cube), but most levels in this game are relatively flat, and even with a lot of mostly-empty chunks, it doesn't affect performance much.
Thanks for reading
Any questions? Feel free to leave them below! I'd like to release the source code at some point soon, as well as do a more deep technical dive. But to be honest, other than some of the weirdness of editing meshes or the 'rules' around using Unity's EditorWindow, the 'logic' of placing cubes and adjusting them via rules isn't too complicated - it just requires some organization. Once you can 'mentally divide' where the work should happen it's not too bad - e.g. the UI for placing cubes is simple, and it's mostly upon the user drawing a cube, that some of the weird autocubing logic has to be run. In this respect, my work on doing the ONYX Linking engine for Sephonie was very good preparation!
Comments
Log in with itch.io to leave a comment.
I was wondering, how do you handle collisions for each chunk? Is it broken down into a bunch of box colliders? Do you use your own custom colliders instead of the builtin physics?
I forget if I responded! but anything in a chunk gets added into a composite, static mesh collider for that chunk.
Props like bushes, trees, boxes, etc, which are added separately, have their own collision behavior.
it looks very fun to cube. I want to cube.
Very nice tool and great write-up, thanks for sharing!
thanks!
thats a cool tool! I'd love to try it out when the source code gets released. Any particular reason you chose 14x14 rooms, rather than a classic 16x16 or whatever?
we sized the player around 1x1 units, and 14x14 ended up being a decent amount of visual density while also being wide enough to handle kind of the combat the game has!